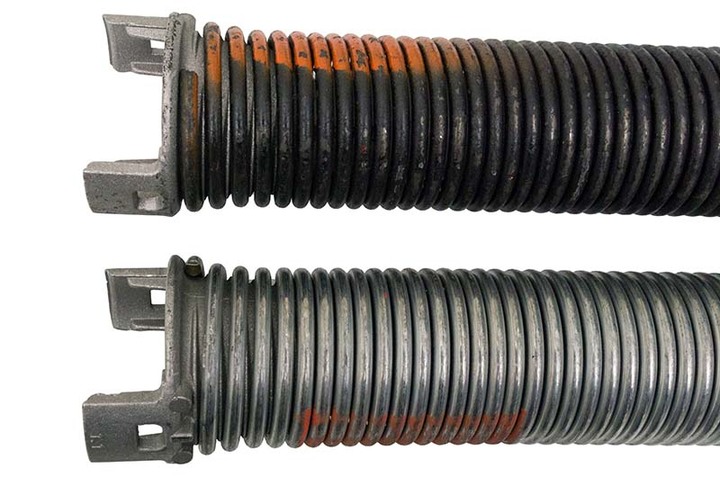
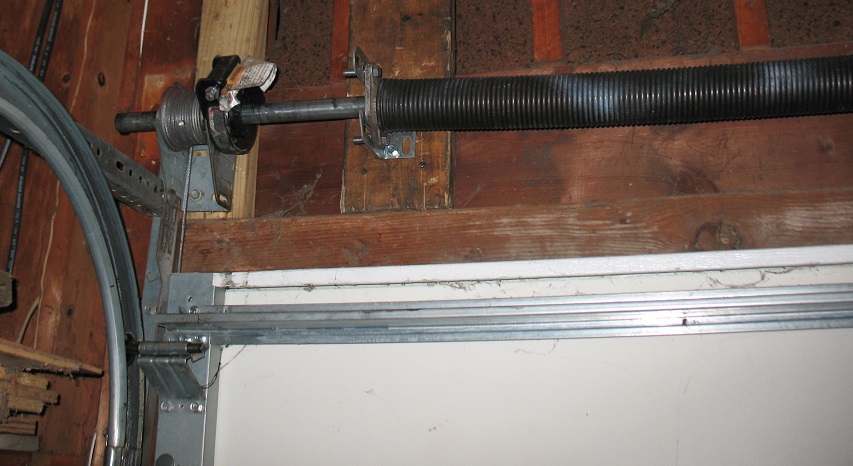
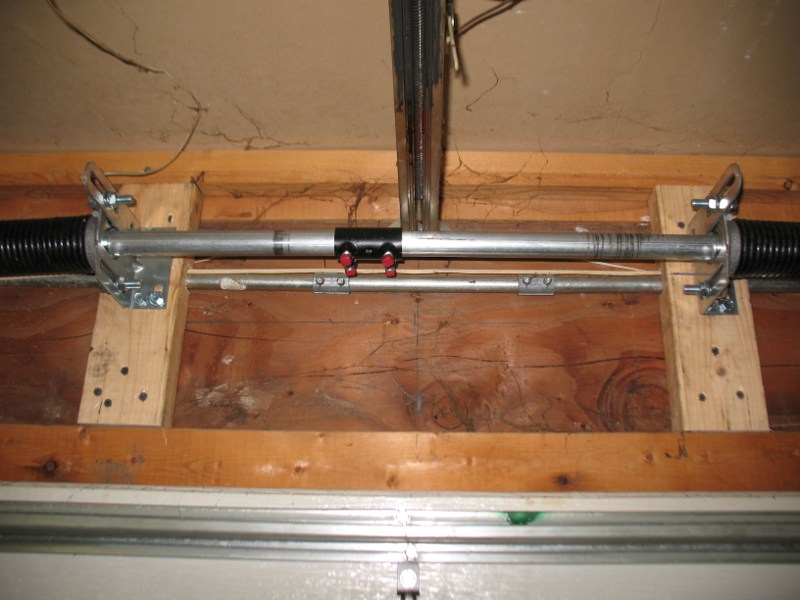
There are two main categories of garage door springs: torsion springs and extension springs. Garage door torsion springs are engineered with five designs: Standard Residential Torsion Springs and Standard Commercial Torsion Springs, EZ-SET Torsion Springs, Torquemaster Torsion Springs, Mini-Warehouse Torsion Springs, and Steel Rolling Door Torsion Springs. Garage door extension springs are engineered with two designs: Sectional Garage Door Extension Springs and One-Piece Garage Door Extension Springs.
Introduction to Garage Door Springs
Introduction to Garage Door Springs Video
Garage door springs counterbalance the weight of the door to make it easy to open and close. They serve the same purpose of counterweights used to balance doors in centuries past and in many doors today. For example, if a garage door weighs 100 pounds, a spring force of 100 pounds needs to pull against the weight of the door. This can be accomplished with springs that either stretch or torque special parts to assist in balancing the door.
Replacing garage door springs is dangerous because of the torque in a wound torsion spring or the stretch in an extended extension spring. Garage door repairs often involve replacing garage door parts that are tied into the spring system, and many accidents, injuries, and deaths have occurred for those who have not understood the forces at work. A proper understanding of garage door springs, garage door weights, garage door parts, and how these are interconnected is essential for safe repairs.
https://youtu.be/CjW4vAMmyv8?si=uy14aNZwFjmGEmF3
How to Measure Garage Door Springs
In order to process your order for springs, please provide the following information about each spring: (1) length, (2) wire size, (3) inside diameter, (4) spring wind, and (5) type of ends.
If you have two springs on a residential or commercial door, it is critical that you measure both springs. Approximately 30% of manufacturers and service companies mix wire sizes. Following the steps below will help in getting the correct dimensions.
Likewise, if you have a linear system on a commercial door, make sure that you measure each of your springs. If you have a duplex or triplex system, make sure that you know the inside diameter and wire size for the inner spring(s) and all five characteristics of the outer spring.
How To Measure Garage Door Torsion Springs Video
Measure the Length of the Spring
You need to determine the length of the unwound spring, but you don't need to unwind the spring to measure the length.
If your torsion spring is unbroken and unwound, simply measure the length of the spring. Measure from the first coil on one end of the spring to the last coil on the other end of the spring. Do not include the cones themselves in your measurement, but include the coils that are on the cone.
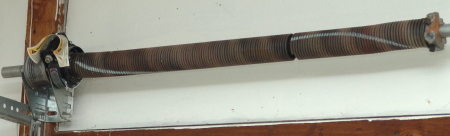
If your torsion spring is broken, loosen the setscrews on the winding cone. Caution: If the torsion spring is still wound, do not touch the setscrews on the winding cone. Do not touch the bolts that secure the stationary cone to the spring anchor bracket. Once the winding cone is free to slide on the shaft, slide the two parts of the spring back together. The coils should be touching, and there should not be a gap anymore. As with the unwound spring above, measure the distance from the first coil on one end to the last coil on the other. Do not include the cones, but include the coils that are on the cones.
Torsion springs grow one coil in length, with each turn of tension applied to them. The gain in the spring length is replaced with small gaps between the coils when you open your garage door because the setscrews do not move on the shaft, so you cannot open your door to measure the spring length. Measuring a wound spring requires determining the number of turns on the spring.
To determine the unwound length of a wound spring, it is imperative that you exercise caution. Caution: Keep your fingers out of the spring and away from the winding cones - the spring could suddenly unwind at any time.
If there are paint, chalk, or crayon marks wrapping around the spring, this will be easy. The mark originally traveled across the length of the spring and did not wrap around. The torsion spring has one turn for each time the paint stripe comes back to the front of the spring.
Also, if you have a residential garage door with standard 4" cable drums, simply deduct from the total spring length the number of coils added when the spring was originally wound. On seven-foot high doors, this would be eight coils, and on eight-foot high doors, it would be nine coils.
For example, on a seven-foot high garage door, a 34" spring comprised of .250 wire would grow eight coils when it is wound and stretched. The spring will grow 7.5 coils, or 7.5 X .250 for the coil size, or 1 7/8". Springs are usually stretched an extra 1/8", so the total addition to the spring length is eight coils or two inches. The 34" spring will measure out at thirty-six inches. Deducting eight coils from the total length will provide an accurate length of thirty-four inches.
There is another way to determine the number of turns on the springs on larger standard lift industrial doors or residential doors with non-standard drums. Measure the circumference of the cable drum, and measure the height of the garage door in inches. Divide the height of the garage door by the cable drum circumference, then add one. This is the number of turns that are on your spring. For example, a 14' high door is 168" high. Many of these have drums with 17" circumferences. Dividing 168" by 17" would give you 9.88. Add one to this, and you get 10.88 turns, and with a little stretch, a total of 12 coils. Deducting 12 coils from the total length will give you an accurate length of the spring when it is unwound.
If you measure springs on a larger commercial or industrial door and there is not a paint stripe, and if you have a vertical-lift or high-lift garage door, it will probably be easier for you to unwind the springs than to calculate the length of the spring.
Regardless of how you determine the number of turns on a wound spring, count off one coil for each turn and measure the remaining length of the spring to determine the unwound length of the spring.
Determine the Wire Size
10-Coil Measurement20-Coil MeasurementWire Sizeincmincm1 3/4"4.503 1/2"8.990.17701 7/8"4.763 3/4"9.530.18751 15/16"4.883 7/8"9.750.19202"5.084"10.160.20002 1/16"5.264 1/8"10.520.20702 3/16"5.554 3/8"11.110.21872 1/4"5.724 1/2"11.450.22532 3/8"5.954 11/16"11.900.23432 3/8"6.024 3/4"12.040.23752 7/16"6.194 7/8"12.380.24372 1/2"6.355"12.700.25002 5/8"6.675 1/4"13.340.26252 3/4"6.935 1/2"13.870.27302 13/16"7.195 5/8"14.380.28302 7/8"7.345 3/4"14.680.28902 15/16"7.495 7/8"14.990.29503 1/16"7.796 1/8"15.570.30653 1/8"7.946 1/4"15.880.31253 3/16"8.126 3/8"16.230.31953 5/16"8.416 5/8"16.810.33103 7/16"8.736 7/8"17.460.34373 5/8"9.217 1/4"18.420.36253 3/4"9.537 1/2"19.050.37503 15/16"10.007 7/8"20.010.39384 1/16"10.328 1/8"20.630.40624 7/32"10.718 7/16"21.430.42184 5/16"10.938 5/8"21.870.43054 3/8"11.118 3/4"22.230.43754 17/32"11.519 1/16"23.020.45314 5/8"11.729 1/4"23.440.46154 11/16"11.909 3/8"23.810.46874 7/8"12.459 3/4"24.890.49005"12.7010"25.400.50005 5/16"13.4910 5/8"26.980.53125 5/8"14.2911 1/4"28.580.56256 1/4"15.8812 1/2"31.750.6250
The wire size is the thickness of the wire used to make the spring.
When it comes to measuring torsion spring wire, calipers and micrometers are simply not reliable. This is because of four reasons. First, the coil is bent; measuring the curved part of the coil with a micrometer will get you a larger reading. Sometimes there is a straight piece of wire you can measure, but there are other problems. A second problem with calipers and micrometers is corrosion. Rust initially increases the wire size and later reduces it. The third reason you can't measure an individual coil is that many of the springs in recent years have been coated with a thin layer of paint. The fourth problem is that older calipers measured 64ths and 128ths, and many mistakes have been made converting to thousandths of an inch. We recommend using calipers and micrometers only to confirm your 20-coil measurements.
The only accurate way to measure the wire size is to measure 10 and 20 coils. Since the coils rub together when the garage door operates, the sides of the coils are less impacted by corrosion. In addition, when springs are painted, the paint does not get between the coils. The 10 and 20 coil measurements are highly accurate.
To measure 10 coils, insert the end of a tape measure between two coils or hook the tape on the end of the spring if it does not have a cone on it. Then, count 10 coils and pull the tape to the point where the 10th and 11th coils meet. Measure to the nearest 16th of an inch. Note that the hook on the end of the tape is slotted for measuring outside dimensions as well as inside dimensions. Since you are measuring the outside dimensions of the coils, you will need to pull the tape away from the end to get the correct length. Pushing the tape into the end of the ruler will give you a longer length, often 1/16" more. Record this measurement on a piece of paper.
When measuring, make sure all the coils are compressed. If there are gaps between the coils, you will measure incorrectly and order the wrong spring.
Next, measure the width of 20 coils. We measure 20 coils because it is more accurate, and to eliminate errors from counting coils. Record the 20 coil measurement. This reading should be twice as long as your 10 coil reading. If it is not, go back and remeasure 10 and 20 coils.
If you have one spring that is broken and one that is still wound, you will need to measure 10 and 20 coils on the wound spring as well. Caution: Do not touch the setscrews on the winding cone. Do not touch the bolts that secure the stationary cone to the spring anchor bracket. Do not grab the spring.
The spring wire remains the same size after it is wound, so the measurements will not be affected. We measure both springs because about a third of the garage doors installed have unmatched springs on them. Manufacturers do this to minimize cost; service companies do it to minimize inventory. Replacing with matched torsion springs will allow you to maximize cycle life.
With the 10 and 20 coil measurements, you can determine the wire size from the chart above. Note that the dimensions are not exact, but rounded to the nearest 16th of an inch. For example, 20 coils of .177 wire will measure to be 3 1/2" to the nearest 16th of an inch, but not exactly 3 1/2". Dividing 3 1/2" by 20 will give you 0.175, not 0.177.
Note: Wire sizes .200 and .237 are no longer used. If you have springs with these sizes, contact us, and we will calculate replacements for these. The specs generally fall between the wire sizes before and after them on the chart. The .289 was not included in our price list because of its low usage, but springs with that wire can still be made. Just contact us for prices.
If you look at the chart above, you'll notice that there are several items in bold. These measurements are nearly equivalent to the naked eye if you measure them improperly. It is absolutely necessary that you do the 20 coil measurement for accuracy on this particular measurement. If you don't measure properly, you can get a spring that is not strong enough for your garage door.
Determine the Inside Diameter (ID)
Inside DiameterDoor Manufacturer1 19/32"Crawford only1 3/4"Most manufacturers except for BarCol, Crawford, Raynor & Wagner1 13/16"Older Raynor and BarCol only2"Most manufacturers except for BarCol, Crawford, Kinnear, Raynor, Rowe & Wagner,2 3/16"Kinnear only. Raynor springs often measure 2 1/8" or 2 3/16," but they are regarded as 2 1/4."2 1/4"Raynor & Rowe Way only2 7/16"Overhead Door only2 1/2"Wagner only2 5/8"Most manufacturers except for Crawford, Raynor & Wagner2 3/4"Raynor & Rowe Way only2 25/32"Crawford only3"Overhead Door only3 1/8"Kinnear only3 3/8"Overhead Door only3 1/2"Raynor Only3 3/4"Most manufacturers except for BarCol, Crawford, Overhead, Raynor, Rowe & Wagner3 25/32"Crawford only4"Wagner only4 1/8"Kinnear only4 3/8"Overhead Door only4 1/2"BarCol & McKee only4 7/8"Rowe Way only5 1/8"Kinnear only5 1/4"Most manufacturers except for BarCol, Crawford, McKee, Overhead, Raynor, Rowe & Wagner5 1/2"Raynor only5 3/4"BarCol only5 7/8"Overhead Door only6"Most manufacturers except for BarCol, Kinnear, Overhead, Raynor, Rowe & Wagner6 1/2"Kinnear only7 5/8"Overhead Door only8 1/2"Kinnear only
The inside diameter of a torsion spring can be difficult to measure when the spring is on the shaft, so it is better to look for markings on the winding and stationary cones. You will need a flashlight to see these.
The more common inside diameters for residential doors will have "175" or "134" for 1-3/4", as pictured below. Some light commercial doors may also use a 1-3/4" inside diameter spring.
You can usually read markings on the winding or stationary cone. This winding cone says P175W*4 for a 1-3/4" inside diameter, though it could have said "134" instead. The stationary cone should have a similar marking as well.
Embossed on springs with larger inside diameters will be the numbers "2.0," "200," or "2000," corresponding to 2," as pictured below. Raynor 2 1/4" cones are marked with the numbers "1264," "1265," "1266," and "1267." Larger 2-5/8" cones are marked with "258" or "263." Residential torsion springs rarely have an inside diameter greater than 2-5/8".
This stationary cone says P200S*5 for a 2" inside diameter. The winding cone should have a similar marking as well. Many cones, like this one, are difficult to read.This winding cone says "334 WS" for a 3-3/4" inside diameter, though it could have said "375" instead.
Commercial and industrial doors, depending partly on their weight, use torsion springs with inside diameters all the way up to 8-1/2". The markings on these cones are similar: "334" or "375" refers to 3-3/4", "600" corresponds to 6", etc.
If you cannot find any of these markings, measure the inside diameter with calipers or a ruler to the nearest 1/16". Be careful: if you bend your tape measure to get it around the shaft, you will most likely come up with the wrong measurement, and the spring you order will not work properly.
Once you come up with an inside diameter for your springs, confirm this dimension with the manufacturer of the garage door from the chart above if there are any identifying marks on the door.
Determine the Wind of the Spring
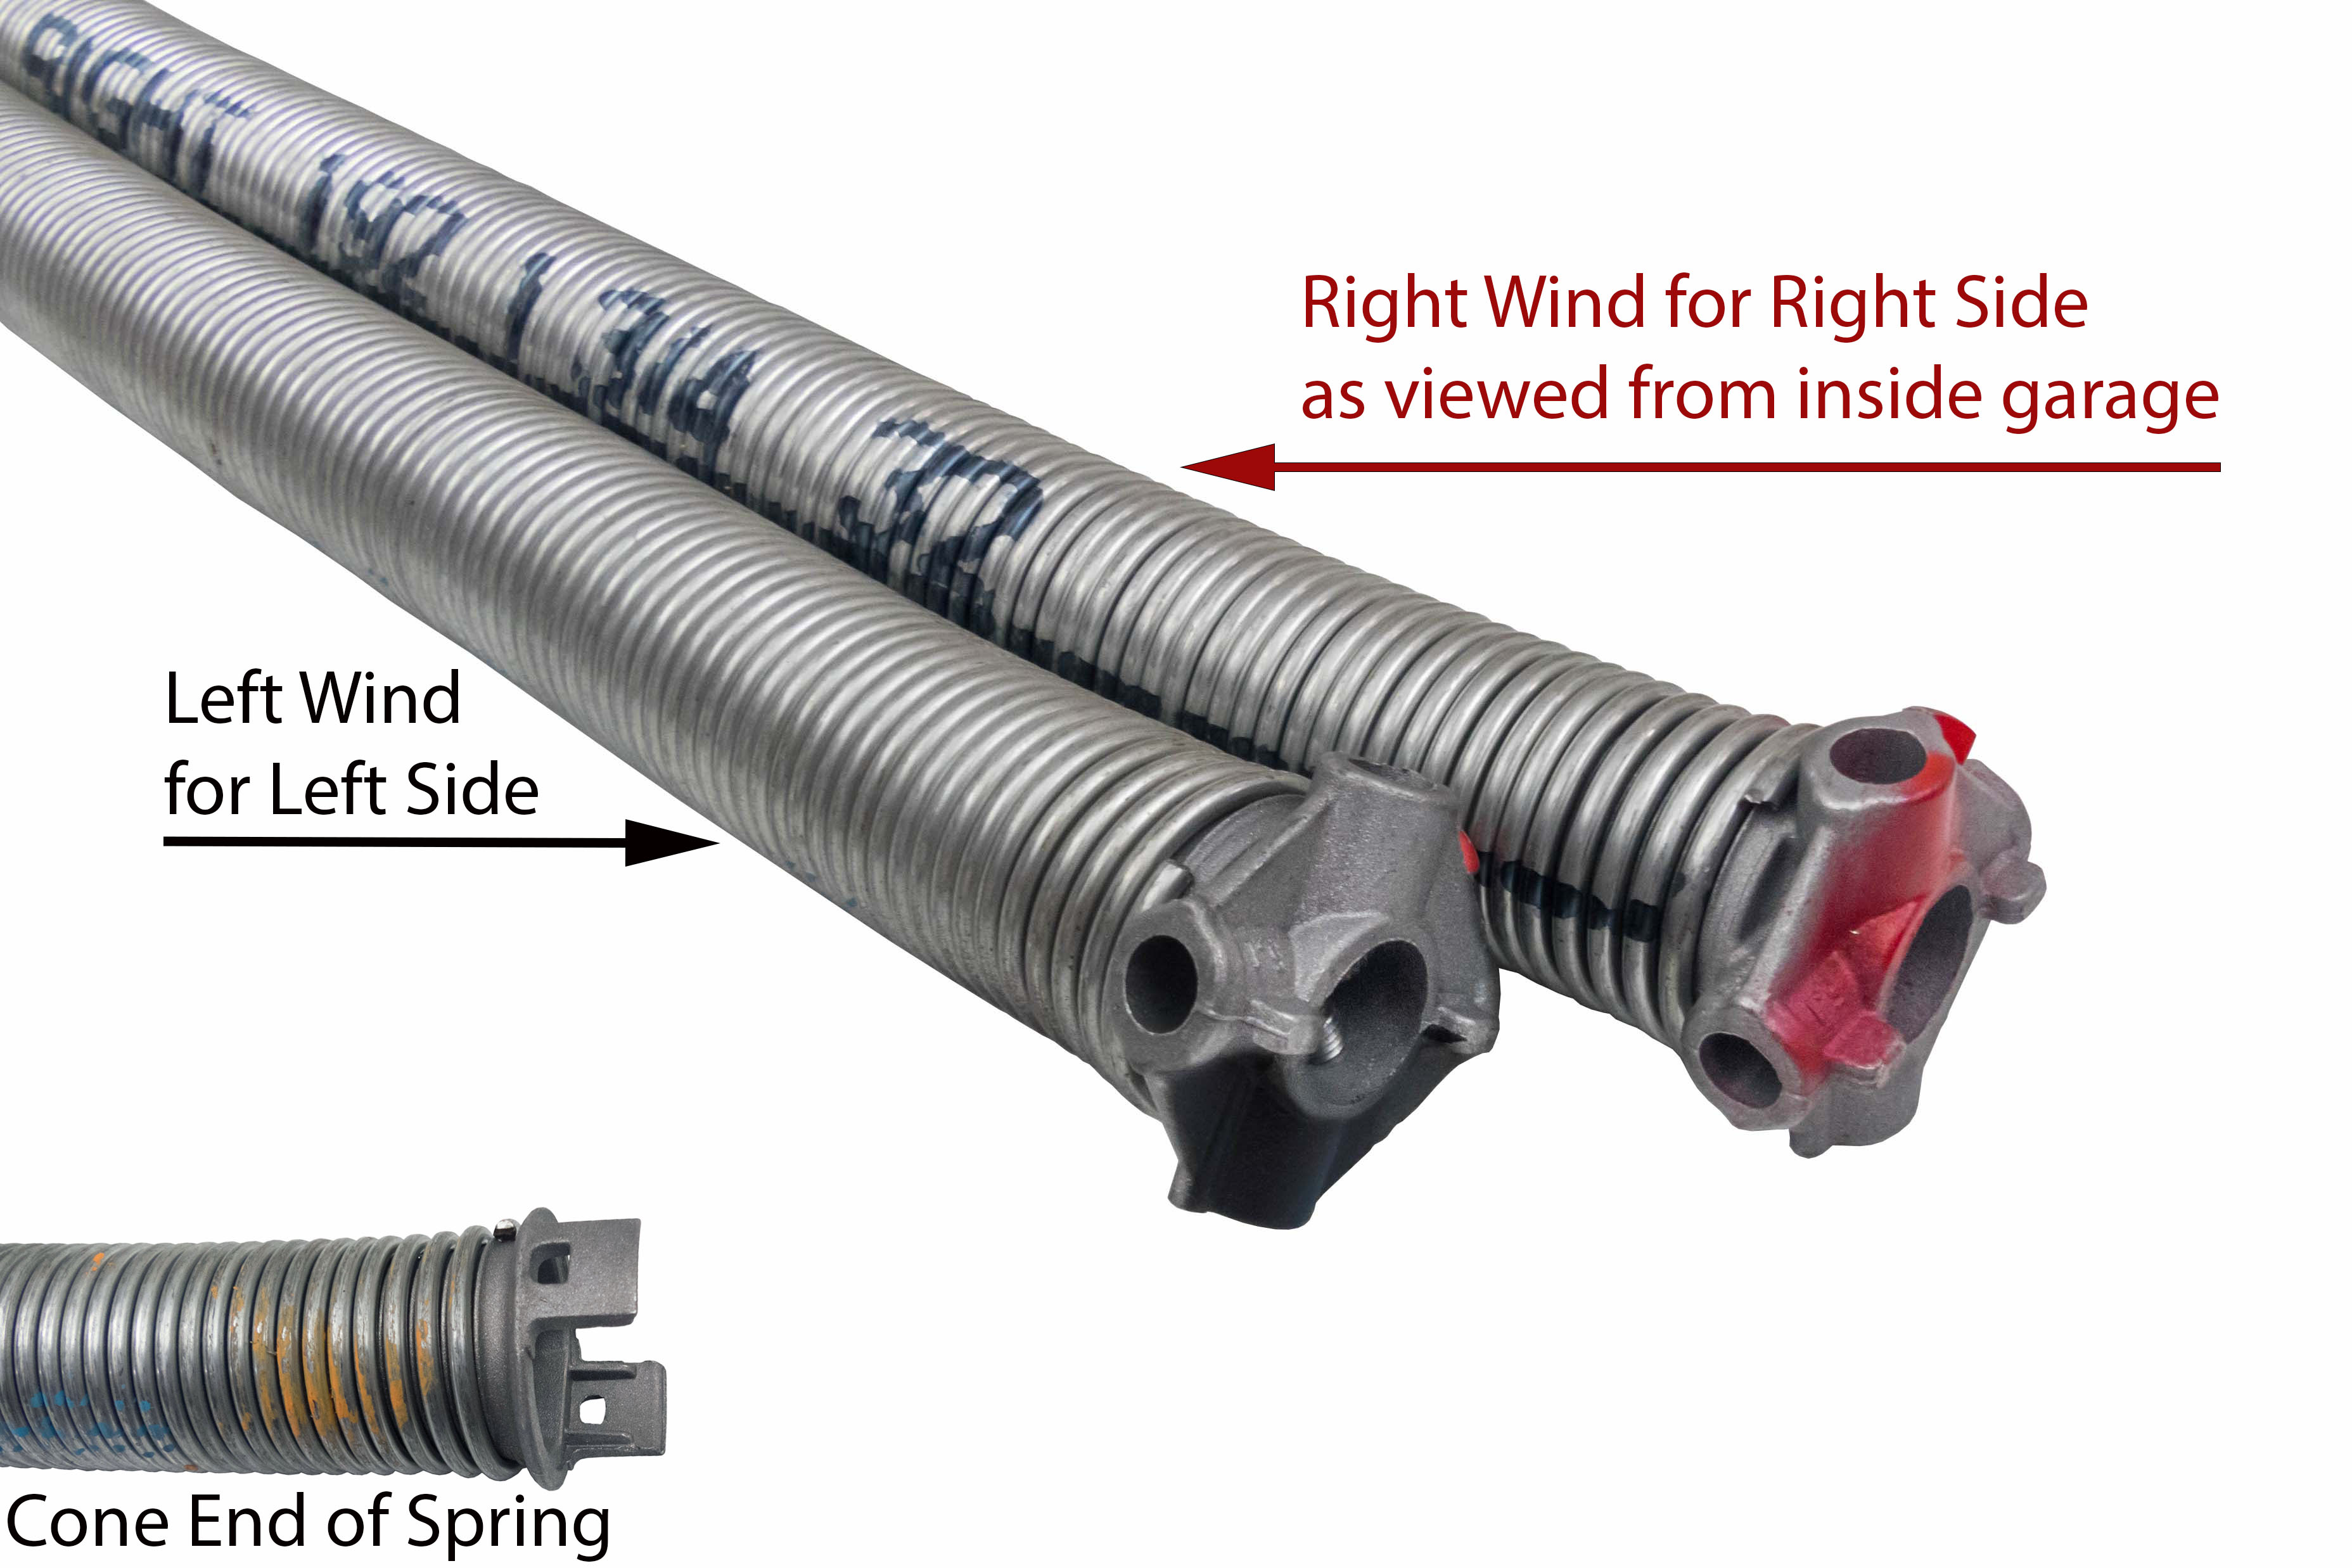
Left wind torsion springs have the wire ending on the left when viewed from the end of the spring.
This is the most confusing part of measuring springs, so you will need to be careful. Examine the drawing to the right. Notice that when the end of the coil is on the bottom, it points to the left. The spring on the left in the drawing is left wind. This is one way to identify the wind.
Another way to determine spring wind is to make a fist, as shown to the left. Notice that the thumb points down and into the "spring," and the index finger curls in the direction of the end of the "spring." A spring following this image of the hand is a right wind spring. A spring following the mirror image created by the left hand is a left wind spring.
Caution: Do not wrap your hand around a wound torsion spring.
On most residential garage doors, the spring to the left of the center support bracket is right-wind, and the spring to the right is a left-wind spring. In other words, the right wind spring is typically on the left side above the garage door, and the left wind spring is above the right side of the door as you view the door from inside the garage.
Special Types of Spring Ends
Most torsion springs have standard ends that are bent out slightly. If the spring you are ordering needs special ends, let us know. Otherwise, you will receive a spring with standard ends.
For example, Crawford and older BarCol springs pictured use end cones that are no longer available. If you would like to reuse your cones, you can order springs without cones.
Back to Top
Measuring Clopay and Ideal EZ-Set Springs
The most challenging torsion springs to measure are the EZ-Set springs because there are gaps between the coils. In order to measure the length of a broken spring, you will need to press the ends of the spring together. Often the black spacer will prevent full compression, so you will need to measure the length of each piece separately while pressing the ends together to remove the gaps between the coils. After that, add the lengths of the two pieces.
In order to measure 10 and 20 coils on a broken spring, you will need to press the coils together while pulling the opposite direction on your tape measure to measure the 10 and 20 coils. It is best to mark the 10 and 20 coils before squeezing the ends of the spring together to measure the coils.
In order to measure an unbroken spring, you will need to place a coin between two coils in the middle of the spring. Next, push the coils to the left and measure the length of the left side of the spring. Then push the coils to the right of the coin to measure the spring length to the right of the coin. If the spring is still wound, you will need to deduct the width of a coil for every turn of tension on the spring.
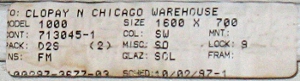
Since measuring the springs can be so difficult, many customers prefer to provide the garage door width, height, and model number. The model number is often embedded in the serial number or PID number located at one end of the garage door.
If you call us with information from the stickers, we can usually determine the springs you need.
How to Replace Garage Door Torsion Springs
Garage door torsion springs are secured to a metal shaft above the garage door. Depending on the system, the shaft may pass through the middle of the springs or spring, or the shaft may sometimes house the spring. If the shaft passes through the middle of the torsion spring, the spring may be mounted in the middle of the shaft or on the end of the shaft by the outside edge of the garage door.
Torsion springs balance the garage door by applying torque to the shaft with drums at each end. Attached to each drum is a cable that extends to and is secured to the bottom fixture at the bottom of the door. The torsion spring unwinds and winds as the door is opened and closed to comprise a balanced system.
Torsion springs have three characteristics that determine the lift and cycle life. These properties are the wire size, inside diameter, and length. The lift, which is determined by the torque of the spring, tells how much door weight the spring can lift. The cycle life tells how many times the garage door should open and close before the spring breaks.
Standard torsion springs, pictured here, are secured to the spring anchor bracket and rotate a metal shaft with a 1" outside diameter.Standard torsion springs are the most common residential torsion springs in the garage door industry.
Residential garage doors typically use either one or two springs. On a lighter garage door, one spring will suffice. In that case, the torsion spring may be mounted to the spring anchor bracket in the middle of the shaft above the garage door. Other times, the spring has an offset mount, meaning that installers do not mount the spring anchor bracket above the center of the garage door.
If two torsion springs balance the garage door, they are typically mounted to the spring anchor bracket above the middle of the garage door. Having two springs on the garage door tends to make it safer, especially if one spring breaks when the door is open. The other spring will then keep the garage door from falling and injuring a person or causing damage to the garage door or other property.
Does your door use standard torsion springs? Go to our Standard Garage Door Torsion Springs page to learn more and to order new springs for your garage.
Buy Standard Torsion Springs
Back to Top
Frequently Asked Questions ▲
▼ Which springs should I order? ▼ Should I buy the same spring that was on my garage door before? ▼ What should I do if I want to buy a different spring than my current spring, or I am not sure what my current spring is? ▼ Long Life Torsion Springs ▼ What is the difference between right and left wind springs? ▼ One garage door spring or two? ▼ Should I replace both springs on my double car garage door? ▼ Should I replace both cables? ▼ Do torsion springs come with or without cones? ▼ What do I need to buy with my garage door springs? ▼ What do I need to know about shipping and returns? ▼ What are the dimensions of my current torsion spring? ▼ What do I do if my current spring does not match my door weight? ▼ What do I do if my current springs are different dimensions? ▼ Spring and Drum Conversions ▼ Custom High Lift Conversions ▼ How to Determine the Track Radius
Clopay EZ-SET Torsion Spring System: The white plastic shaft retainer holds the shaft next to the cable drum, which sits next to the winder.EZ-SET torsion springs appear very similar tostandard torsion springs, but the hardware is quite different. Door installers mount EZ-SET springs to winders on theends of the shaft, which is also 1" in diameter. The black winder has the letter "R" or "L" on it, corresponding to the right or left side of the garage door.
As with standard residential torsion springs, typically, one or two springs fit on the shaft. While most two-car garages will have two EZ-SET torsion spring. In this case, the spring is usually mounted on the left side of the garage door.
Clopay EZ-SET shaft support bracket.Some of the wider garage doors have two shafts with acouplerin the middle to connect the two. This extra piece of hardware can save you a lot of time and trouble replacing your EZ-SET torsion springs in cases with very little space between the end of the shaft and the wall.
Double-car garage doors, with either one spring or two springs, will have a center support bracket (pictured). Single car garage doors will not have this bracket--typically, nothing supports the middle of the shaft.
Does your door use EZ-SET torsion springs? Go to our EZ-SET Torsion Spring page to learn more and to order new springs for your garage.
Buy Clopay, Ideal and Holmes Garage Door EZ-Set Torsion Springs
Back to Top
Wayne Dalton's unique design for their TorqueMaster torsion spring assembly.Wayne Daltondesigned itsTorqueMastertorsion spring system to operate even more safely than Clopay's EZ-SET system. The garage door has one or two springs nested inside of the shaft. The cross section of the shaft is not circular - one quarter of the shaft extends outward to form an edge. The spring stays fastened inside the shaft by thestationary cone, which matches the shape of the shaft.
On earlier garage doors, the TorqueMaster spring comes equipped with a winding cone on the opposite end, which extends past the end of the shaft and passes through the cable drum. The winding cone fits inside a special winder, which allows the torsion spring to be wound with an electric drill. Newer doors with Torquemaster springs are wound with a wrench or a socket using a ratchet system.
Wayne Dalton's special center bracket.Thecable drumssupport the ends of the shaft, these being formed of plastic. Wayne Dalton manufactures the TorqueMaster with about three grooves that sit higher than the rest of the grooves. They set the remaining grooves to give the cable a 2" diameter as it wraps around the drum.
The center of the shaft has a circular piece that fits on the center support bracket. When the garage door opens, the circular piece rotates with the shaft and remains on the center bracket.
Buy Wayne Dalton TorqueMaster Torsion Springs
Back to Top
Commercial and Industrial garage doors typically have at least two torsion springs. Many of these doors use four or more torsion springs in one of four setups: linear, duplex, triplex, or mixed.
Linear System: Two springs installed on the left side of this garage door, with two other springs on the right side as well.Thelinear systemcomes into good use more commonly with wider garage doors through which large vehicles need to enter. Since these garage doors tend to be wider, four or more torsion springs line up on the shaft with ease. Customers installing the linear system gain the advantage of less costs for the springs and spring hardware than for the materials in the duplex/triplex spring systems.
Duplex System: On the left of this picture is the shaft with a bearing and the spring anchor bracket. The end of the wire on both torsion springs hooks into the stationary cones.Theduplex systemonly appears to have two very large springs, one on each half of the garage door. Inside of each torsion spring, however, is another spring with a smaller inside diameter. The duplex spring system supplies extra torque, and thus lift, from the torsion springs without needing the extra space on the shaft as with a wider garage door system.
The triplex system functions very similarly to the duplex system. In this setup, there are two springs inside the outer spring.
The mixed system, as you guessed, features a combination of the linear system and the duplex/triplex system. Mixed systems use more than one set of duplex or triplex springs on each half of the garage door. This becomes an option for installers when the garage door shaft measures long enough to accommodate multiple springs. If one of these garage doors weighs very heavy, it is sometimes a better option to have multiple pairs of duplex springs sets on the garage door.
Users of the duplex and triplex systems, however, often find it difficult to detect a possible broken inner spring.
Since commercial, industrial doors tend to weigh more, the torsion springs used in these settings usually have a larger inside diameter and wire size than residential torsion springs. While the springs on many doors use shafts with a 1" outside diameter, some doors instead use a 1-1/4" outside diameter shaft. These shafts are only used with bearings, cable drums, and winding cones with 1-1/4" openings for the shaft. Heavier doors often use a solid shaft, while lighter doors tend to use hollow shafts. Some solid shafts are keyed, giving a groove along the length of the shaft that, when coupled with a shaft key, can help keep the cable drums from spinning loose.
Does your commercial door use standard torsion springs? Go to our Commercial and Industrial Torsion Springs page to learn more and to order new springs for your garage. Also, if you have a more common residential garage door spring, you can try searching for your spring in our Find My Spring Database™. For information on how to measure your spring, please see our How to Measure Torsion Springs tutorial.
Buy Standard Commercial Torsion Springs
Back to Top
Steel rolling doors are not made of sections like most garage doors. Instead, they join together by interlocking slats, which allow the door a greater range of mobility as it opens. With the extra mobility available, the rising garage door wraps securely around a barrel.
Secured inside the barrel is a torsion spring. The spring counterbalances the door weight to make the door easier to operate. The barrel remains closed on both ends, so you cannot see the springs inside. While many doors only have one spring, some heavier steel rolling doors use multiple springs to balance the extra door weight.
The barrel comes equipped with two head plates, located on each side. Two pieces of shaft pass through a bearing in the head plates and into the barrel. Inside the barrel, idler brackets support the shafts. Pins or screws fasten these brackets to the barrel.
The shaft supports the torsion springs. One of the idler brackets serves as a spring anchor bracket to anchor the torsion spring. The other end of the spring typically has a cone that is secured to the shaft with set screws, though some springs have a special loop at the end that is secured to the barrel with a rod.
One side of the steel rolling door has a winding unit. A piece of angle above the winding wheel is secured to the head plate. This supports a bolt that rests inside the winder to anchor the shaft. You can adjust the spring tension by inserting a winding bar in another hole in the winding wheel, pulling down on the bar, and removing the bolt to free the wheel and shaft to turn. Spring tension is added by winding down on the winding wheel. A sprocket assembly connects to the shaft on the other side of the barrel. Installers typically attach an opener or a chain hoist to this assembly to operate the door.
Do you have a steel rolling garage door? Go to our Steel Rolling Door Torsion Springs page to learn more and to order new springs for your garage.
Buy Steel Rolling Door Torsion Springs
Back to Top
Self-storage locations make use of self-storage roll-up doors. These doors were manufactured byTrac-RiteSelf-storage roll-up doorsoperate in a manner similar to steel rolling doors. You'll find these doors at self-storage locations. They are also calledmini-warehouse doorsandone-piece curtain doors, and they vary widely in width and height.
Manufacturers roll mini-warehouse doors from a single piece of steel. While steel rolling doors use interlocking slats to form the curtain, mini-warehouse doors use single-piece curtains. As the door opens, the curtain wraps around the drums, which are secured to the shaft. Because of this, roll-up doors can be called one-piece curtain doors or steel rolling doors.
The end of the torsion springs on self-storage roll-up doors is secured to one of the drums. The special spring ends wrap around a bolt that fastens to the drum.Spaced along the axle are circulardrums. These parts help to support the curtain as the door opens. The torsion springs secure to the outer-most drum with a bolt as pictured. Typically two torsion springs balance each door with one each end of the shaft.
The other end of the torsion spring secures to the door bracket just to the outside of the door. The axle passes through this bracket, through the middle of the torsion spring, and through the drums.
Some manufacturers, such as Janus International and Trac-Rite, make doors with a special tension adjustment wheel, while doors by other manufacturers such as DCBI do not have this special adjustment tool. Typically, the springs on rollup doors without tension adjusters are visible when the door is open. Those with tension adjusters tend to have a steel wrapping around the drums, hiding the springs from view.
Buy Self-Storage Roll-up Door Springs
Back to Top
Garage Door Extension Springs
Garage door extension springs are usually mounted along the sides of the garage door or above the horizontal tracks. Extension springs stretch and contract as the door operates to counterbalance the weight of the door.
Most residential garage doors only have two extension springs - one on each side of the door. Commercial doors, however, as well as some residential doors, often have multiple springs installed on each side.
Extension springs have either open loops, closed loops, or clipped ends to secure the spring to the garage track hang, pulley, pivot pin, frame, or tension adjusting bolt.
Sectional garage door extension springs are the more common type of extension springs installed here in the United States. These springs stretch above and parallel to the horizontal tracks on each side. They counterbalance the garage door by pulling on the cables. As the door closes, the door weight is transferred from the tracks to the cables, and the door it gets heavier, but the springs are also stretching and pulling against the cables to balance the door and make it easier to operate.
The back end of the extension spring connects to an open-eye bolt or an s-hook, which connects in turn to angle iron or the garage frame. This spring uses a wire as a safety cable.Residentialgarages almost always utilize two springs, one on each side of the door. One end of each spring usually connects to an open-eye bolt. This bolt usually fastens to the angle iron that holds to track or to a beam in the garage frame.
The other end of the extension spring connects to a pulley with a pulley fork.A pulley typically attaches to the other end of the extension spring with the help of a pulley fork. One end of the cable that goes over this pulley is attached to a cable adjustment clip. An S-hook attaches to this clip, as well as to the horizontal track. The other end of this cable rolls over a second pulley and down to the bottom fixture on the bottom section of the garage door.
While one end of the cable attaches to the bottom fixture, the other end attaches to a cable clip. An S-hook secures this clip to the track.Do you have sectional garage door extension springs? Go to ourSectional Garage Door Extension Springspage to learn more and to order new springs.
Commercial and industrial overhead doors have an extension setup very similar to residential garage doors. On heavier doors, there may be a special kit that connects the ends of multiple extension springs. This allows two or more springs to be stretched simultaneously on each side of the garage door.
Not all commercial and industrial garage doors have this setup installed. Some still just use one extension spring on each side. For the most part, though, the rest of the system functions the same as with residential doors. Pulleys supply lift in both types, though commercial pulleys tend to be a lot stronger and capable of lifting heavier doors without premature breakage.
Do you have sectional garage door extension springs? Go to our Sectional Garage Door Extension Springs page to learn more and to order new springs for your garage.
Buy Sectional Garage Door Extension Springs
Back to Top
Just as the name implies, One-piece garage doors operate as one large piece. When the door opens, the top moves inside of the garage, usually on tracks, while the bottom of the door rises outside of the garage. Extension springs pull against a pivot pin or a connecting point to counterbalance the weight of the door.
Since the bottom of the door moves both toward the inside and outside of the garage, weatherstripping this type of door is not feasible. As a result, one-piece garage doors are more popular in climates less prone to harsh weather.
One-piece garage door systems use extension springs to counterbalance the door. These doors typically use one or two extension springs on each side of the door, for a total of 2 or 4 springs on the door.
The bottom of the spring is secured to an adjusting bolt, which is fastened to a door jamb bracket. The top of the spring has a loop or a clip positioned over a large pivot pin or bolt. The springs stretch upward, nearly perpendicular to the garage floor. The other end of the spring attaches to a lever arm. The lever arm is attached to the garage door. As you open the door, the extension spring shortens and loses some of its stretch.
Do you have one-piece garage door extension springs? Go to our One-Piece Single Panel Garage Door Extension Springs page to learn more and to order new springs for your garage.
Buy One-Piece Garage Door Extension Springs